How to Create a Free Personal Blog Using Hugo and GitHub Pages

Background
I have had more spare time since I changed my job earlier this year. I have been contemplating ways to share my life and technology experiences while also enhancing my writing skills. Although Wordpress appears to be a quite popular platform for personal blogs, I’d rather not deal with ongoing expenses for servers or disruptions caused by irrelevant technical tasks like virtual machine and database configurations.
That’s why using an open source Static Site Generator along with a free web hosting service seems like the ideal approach for me. Here are the tools I used:
- Hugo: An open source Static Site Generator written in Go that allows you to create fast and flexible websites such as personal blogs, company homepages, galleries and many more.
- GitHub Pages: A free web hosting service provided by GitHub that allows you to host your site directly from your GitHub repository.
In the end, I built this site to serve as my personal blog by following the documentations of those tools. I decided to document the entire process as a future reference for myself, and for anyone else, like you, who happens to come across this post by chance.
Installation
There are 3 other tools that required to be installed besides Hugo: Git, Go and Dart Sass. I installed these tools on both my Windows 10 PC and MacBook.
Windows
Install Hugo
I installed Chocolatey first since both Hugo and Sass can also be installed through Chocolatey easily.
Install Chocolatey
Open PowerShell as administrator and type:
1Get-ExecutionPolicyIf it returns Restricted, run the following command:
1Set-ExecutionPolicy AllSignedRun the following command to install Chocolatey:
1Set-ExecutionPolicy Bypass -Scope Process -Force; [System.Net.ServicePointManager]::SecurityProtocol = [System.Net.ServicePointManager]::SecurityProtocol -bor 3072; iex ((New-Object System.Net.WebClient).DownloadString('https://community.chocolatey.org/install.ps1'))Wait for the command to complete, then confirm Chocolatey has been installed correctly:
1choco -?
After installing Chocolatey, install Hugo:
| |
Install Git
Download the standalone installer from download page and install it.
Install Go
Follow this documentation to download and install Go.
Install Sass
Run following command in PowerShell:
| |
macOS
Install homebrew whether it is not installed yet.
Install Hugo
Open Terminal and run following command:
| |
Install Git
Run following command:
| |
Install Go
Follow this documentation to download and install Go.
Install Sass
Run following command:
| |
Create a site
Run following commands in PowerShell or Terminal.
Create the directory structure in the mysite directory:
1hugo new site mysiteChange working directory to the root of mysite:
1cd mysiteCreate an empty Git repository in the working directory:
1git initClone the DoIt theme to the theme directory, adding it to mysite as a Git submodule:
1git submodule add git submodule add https://github.com/HEIGE-PCloud/DoIt.git themes/DoIt themes/DoItApply theme:
1echo "theme = 'DoIt'" >> hugo.tomlNow start Hugo’s development server and open the URL displayed in terminal to have a look at the site we created.
1hugo server
Development server can be stopped by pressing Ctrl + C.
Add a post
Add a new post to mysite:
1hugo new content posts/my-first-post.mdA markdown file was created in content/posts directory by Hugo. Open the file:
1
2
3
4
5
--- title: "My First Post" date: 2023-07-19T17:51:29+09:00 draft: true ---Add some content to the body of the post and save the file.
 1
 2
 3
 4
 5
 6
 7
 8
 9
10
--- title: "My First Post" date: 2023-07-19T17:51:29+09:00 draft: true --- ## Introduction Hello! This is my first post.Start Hugo’s development server again and have a look at the post:
1hugo server -D
Host on GitHub Pages
A GitHub account is required for hosting site on GitHub Pages. Sign up an account if you don’t already have one.
Create a new repository. Usually, a Pro(paid) account is needed to host site from private repository. Create a public repository if you want to host your site free.1

Push local repository of mysite to GitHub:
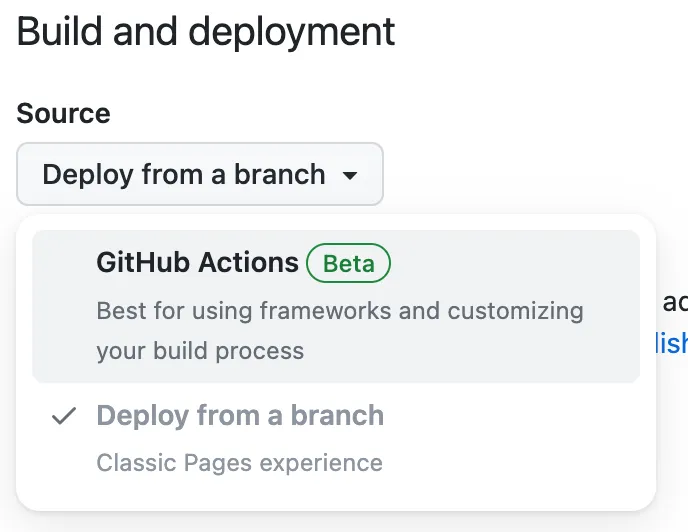
1
2
3
git remote add origin [email protected]:$GitHubUserName/$RepositoryName.git git branch -M main git push -u origin mainOpen GitHub repository page. Click on Settings > Pages.

Change the Source to GitHub Actions.
Create an empty file in local repository.
.github/workflows/hugo.yamlCopy and paste the following YAML into the file created in step6. Change the branch name and Hugo version.(If you used the command in step3, the branch name should be main. And Hugo version can be confirmed by running
hugo versionin Terminal. It is better to use the same version in both local and remote repository.)1 2 3 4 5 6 7 8 9 10 11 12 13 14 15 16 17 18 19 20 21 22 23 24 25 26 27 28 29 30 31 32 33 34 35 36 37 38 39 40 41 42 43 44 45 46 47 48 49 50 51 52 53 54 55 56 57 58 59 60 61 62 63 64 65 66 67 68 69 70 71 72 73 74 75 76 77 78# Sample workflow for building and deploying a Hugo site to GitHub Pages name: Deploy Hugo site to Pages on: # Runs on pushes targeting the default branch push: branches: - main # Allows you to run this workflow manually from the Actions tab workflow_dispatch: # Sets permissions of the GITHUB_TOKEN to allow deployment to GitHub Pages permissions: contents: read pages: write id-token: write # Allow only one concurrent deployment, skipping runs queued between the run in-progress and latest queued. # However, do NOT cancel in-progress runs as we want to allow these production deployments to complete. concurrency: group: "pages" cancel-in-progress: false # Default to bash defaults: run: shell: bash jobs: # Build job build: runs-on: ubuntu-latest env: HUGO_VERSION: 0.115.3 steps: - name: Install Hugo CLI run: | wget -O ${{ runner.temp }}/hugo.deb https://github.com/gohugoio/hugo/releases/download/v${HUGO_VERSION}/hugo_extended_${HUGO_VERSION}_linux-amd64.deb \ && sudo dpkg -i ${{ runner.temp }}/hugo.deb - name: Install Dart Sass run: sudo snap install dart-sass - name: Checkout uses: actions/checkout@v3 with: submodules: recursive fetch-depth: 0 - name: Setup Pages id: pages uses: actions/configure-pages@v3 - name: Install Node.js dependencies run: "[[ -f package-lock.json || -f npm-shrinkwrap.json ]] && npm ci || true" - name: Build with Hugo env: # For maximum backward compatibility with Hugo modules HUGO_ENVIRONMENT: production HUGO_ENV: production run: | hugo \ --gc \ --minify \ --baseURL "${{ steps.pages.outputs.base_url }}/" - name: Upload artifact uses: actions/upload-pages-artifact@v1 with: path: ./public # Deployment job deploy: environment: name: github-pages url: ${{ steps.deployment.outputs.page_url }} runs-on: ubuntu-latest needs: build steps: - name: Deploy to GitHub Pages id: deployment uses: actions/deploy-pages@v2Commit the change to local repository and push to GitHub.
Click on Actions from GitHub repository. The orange circle indicates the workflow is running now:
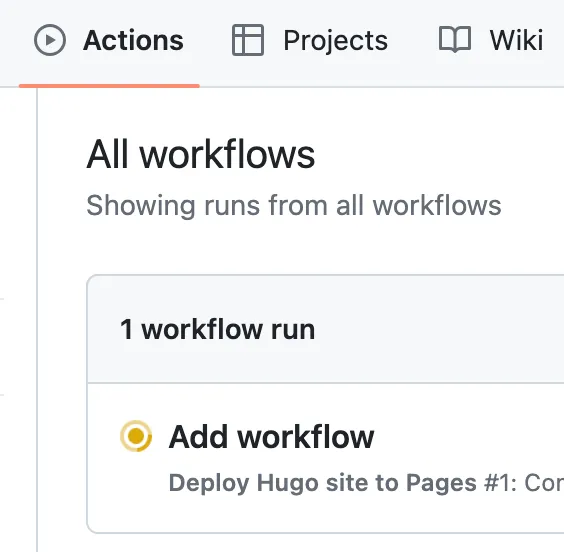
After the workflow finished, the indicator will change to a green check.

Click on the workflow. the url to mysite will be shown:
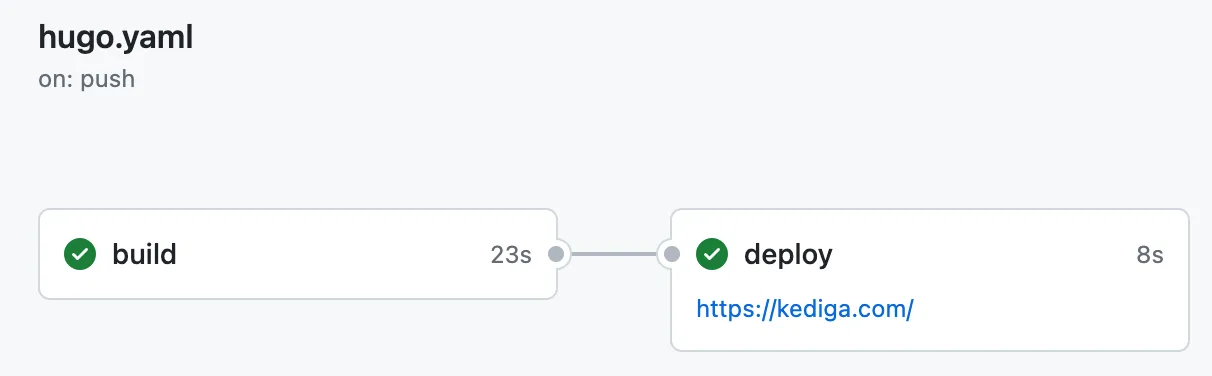
Click on the url to access mysite that is being hosted by GitHub Pages now. Normally, the URL should be in the format
https://$GitHubUsername.github.io/$RepositoryName1. However, I have been using a custom domain which is why my URL is different. From now on, whenever a change is made to this GitHub repository, GitHub will rebuild mysite and deploy the changes.
If you have any questions or advice, leave me a comment below and I will try my best to respond!
This an indirect way of hosting Hugo site from private repository. ↩︎
